My first project was actually a book cover but it was a complete fail as it didn't fit anything but Lord of Rings - not great, so I decided that today I was going to make something 'useful' from The Liberty Book of Home Sewing.
I'm not sure why as I have no particular use for it but I thought the Sugar-Bag Doorstop was a good a place to start as any.
So first I cut out all the required pieces of material, one main piece 40cm x 20cm, a handle piece 17cm x 10cm and three end pieces 14cm x 9cm. As a complete novice I didn't question at this point why I needed three end pieces for a rectangular shape!?!?!
Next came constructing the handle, I couldn't understand the instructions as they seemed to imply to sew it the wrong side out so I used some artistic license and reversed them. My way to make it was by folding and pressing a 1cm turning on the long sides, then folding in half so these sides met and then stitching all the way around. Afterwards I stitched it to one of the three end pieces.
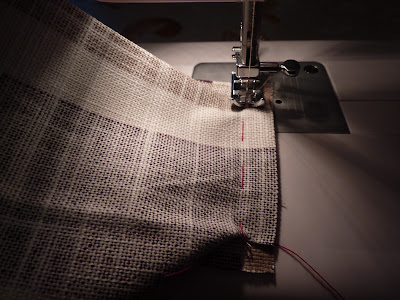
Next I stitched the larger main piece and pressed it into the shape that matched the top end, including a 1cm (very roughly) seam allowance. After pinning and tacking it into place it looked like this.
So far so good, though this was a bit fiddly. I never thought I'd be a fan of ironing but I would have made a right mess of it if I hadn't done so. So next I stitched along the tacking twice, four times on the handle areas.
Now for the elusive three end pieces, very boring really, two layers were used on the bottom to reinforce the base. So I tacked these together, with the help of mousy my pin cushion, and repeated the previous step by this time leaving a 8cm space on one long edge to turn the fabric the right way around and fill.
Speaking of filling, I hadn't quite got this part figured out when I started the project. I had seen the name Sugar-Bag Doorstop and stupidly picked up an extra bag of sugar at Morrison thinking it went inside as it was. However after thinking it through (or in truth being told by my mum sugar wouldn't be great as we might get mice) I decided to raid the cupboard for rice.
Luckily we had a 1kg bag (there goes the chilli con carne planned for dinner) but this hardly filled it at all. So after filling it with a combination of country soup lentil mix, cous cous and paella rice the doorstop was almost complete.
Now for the final bit, closing the gap used to fill it with the entire contents of the kitchen. The instructions said "neatly and securely hand sew the opening closed, using slipstitch". Slipstitch?!?!?! After a phone call to my mother (no idea) and a few repeat views of youtube videos I was pretty impressed with my invisible seam.
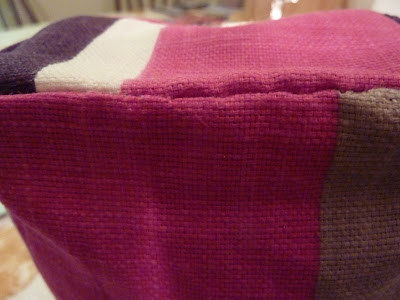
So there, finally a completed doorstop, not that any of my doors close on there own. Ah well I'll use it for now as a book end.
If you want more information on the instructions then please get in touch, or if I were you buy the book, this project starts on page 37.
Oh and as for the sugar, it will be used just fine as after returning from my mums for the christmas holiday I'm now having more sugar in my tea than ever.


Don't blame me for the sugar fixation! Looks pretty neat, particularly impressed with Mr Mouse helping
ReplyDeleteIt is your fault though, I never had sugar in tea before coming home. It is very neat, I was impressed with myself too. Although Matt has just made me make him a Kindle case from an old shirt and trousers, that is very botched as he kept changing what he wanted done :-) Mousey is a very good helper.
ReplyDelete